Posted on

Take a Line for a Walk

IMG_0789

Here we are again, First-Days-of-School upon us. All of us teachers are certainly prepared with a hefty handful of academic goals, each comprised of an even heftier handful of learning objectivStill I can't help but smile, as Fall sneaks in from the wings stage right, and Summer exits the wings stage left. I'm in the audience applauding joyfully, overcome with Fall-feelings. And all this smiling reminds this teacher that education is more than the academic goals I have set for the coming year.

Education is looking up in delighted silence marveling that the leaves have, once again, begun to turn gold, rust, and chartreuse.

Education is learning to enjoy process, the process of entering into a great story, the process of engaging with a mathematical problem.

Education is the ongoing engagement with the process of success and the process of failure  

Education is embarking on a journey.

Truth be told, education is a kindred relative of art-making.

So this year let's begin by inviting Paul Klee to teach our students to slow down into their important work.

As students are taught to engage in complicated activities slowly over time, they will begin to recognize that becoming educated is something far more weighty that getting the right answers. Slowing into their important work, students will enter the art of learning.

IMG_0788

Introduce your students to Paul Klee, the Swiss/German artist of the 20th century whose whimsical paintings still take the world by storm, putting smiles on the faces of viewers of all ages.

Paul Klee reminds us that "A drawing is simply a line going for a walk." So let's go for a walk with Paul Klee lines.

Begin this exercise by providing a variety of finely sharpened colored pencils or a variety of colored, fine-tipped Sharpee pens. Have your student first choose one of the line/dot compositions to copy. Begin by showing the student how to trace from one line to one dot with a finger. Tracing enables the student to experience subtle angles on the page and to map out a plan for the copywork. Once a finger tracing is complete, start in one corner of a blank sheet of good quality drawing paper and draw the first "anchor" line with one color. When it is time for a dot, choose another color. For the new line that connects to that dot, choose yet another color. Continue this process until the Paul Klee black and white line/dot drawing has been transformed to a unique colorful masterpiece all your student's own.  Please note, this exercise will take time and is best accomplished over two or three hour-long sittings. It can be accomplished by students young and old, by anyone, in fact who can manage a pencil with a willingness to try.

Finally, keep in mind, this exercise, while led by a famous artist, is not primarily an art lesson. Art is a secondary outcome. This is a lesson in slow attentive observation. It is an activity that will strengthen strategies that will be useful in all academic pursuit. Most importantly, taking a line for a work demonstrates that learning is and should be a joyful pursuit.

Happy fall to all.


-Kim

PS … and if you want to try a fun Paul Klee painting exercise, click through  

Posted on

April Showers

IMG_0759

For this project, begin with a sheet of watercolor paper or heavy cardstock. Next practice drawing some iconic clouds on scratch paper. When you are happy with your design, draw three or four or five clouds in pencil lightly on the watercolor paper. Be sure to overlap the clouds a bit. Trace the clouds with a black Sharpee. Once your clouds are established in the sky, use your Sharpee to make textural designs by echoing the curves with repetitive lines. Then it will be time for you to use your Sharpee to make little raindrops fall. This is a terrific opportunity to practice patience, one tiny raindrop at a time. 

IMG_0760

At last it is time to add some color to your clouds. Choose three watercolor blues and washright over the Sharpee cloud.

Sit back, enjoy your art, and stay tuned. You know that they say, "April Showers bring May Flowers!"


-Kim

Posted on

Shark Shape Poems

To begin this project, go the the library and gather a collection of shark-picture-books. Read and enjoy at a safe distance. Sharks have sharp teeth.

Next, write a sentence or two about a shark incorporating some true facts and some not-so-true facts (after all, this is poetry). Be sure to include a simile (use the word "like" or "as" to compare the shark to something).

Sketch a few simple shark shapes, no details, just the outer contour. Choose a favorite to enlarge. Using light pencil draw the shark on a sheet of watercolor paper. Trace the light pencil drawing with black Sharpee.

Now write the shark sentences around the shark shape in, once again, very light pencil. When the sentence is spaced and spelled well, trace the words in black Sharpee.

Finally, the fun part… Mix up some deep-sea-watercolor blue and wash it right over the whole thing. Swish, swash, that's right! 

Shark

And when your shark poem is dry, beware of the blur that is caused when it swims right off the page as all good poems should.
Whale


-Kim

Posted on

Metamorphosis for April

IMG_2127

Butterflies are blossoming for the month of poetry!

These lovely creatures began with a lesson on the life cycle of this intricate insect and the book, A Blue Butterfly: A Claude Monet Story by Bijou Le Tord.

From there, with a bit of imagining, we were able to construct a singular sentence: Imagine you are a butterfly... What do you see? What do you sense? What do you wonder? What are you glad about?

Each sentence was thoughtfully considered. Each word matters in a tiny poem! I find that offering little phrases such as, "Butterfly, you…" or "My wings flutter…" or "I am flitting…" (and I'm sure you will come up with a few of your own…), help students overcome the "I Can't" road block. Thing is, they CAN! Most often the sentence starters disappear, over taken by the unique creativity of each writer's unique voice.

IMG_2127

Next, we traced a simple butterfly shape and set it free from sheets of watercolor paper. We used only shades of blue—blue watercolor, blue colored pencil, blue pipe cleaners.
IMG_2127

And the result is poetic. 
IMG_2127


-Kim

Posted on

It’s Spring in Monet’s Garden

Monet6

Claude Monet, leader of the Impressionist movement, was a masterful gardener. Yes, that's right, gardener. I've been to Monet's garden in France. This artist's garden bursts to life in spring. Spectacular is a small word to describe the grounds. You can read about it in the delightful book, Linnea in Monet's Garden. But you can also experience it through his paintings. 

So, on this first day of spring, why not plan a visit to Monet's garden via a "close reading and rendering" of one of his garden paintings? You can learn so much about the art of painting by copying the work of a master. Here is how we did it:

Here's how to paint this painting in two three-hour-sessions:

Session 1

To begin, cover your canvas with a light hue from the painting. While the paint is still very wet, use a clean brush to draw the shapes you see. Let this stage dry completely before proceeding.

Monet5

Next, mix up a a limited palette of colors in jars that can be sealed so the acrylic paint will not dry out. When mixing colors to match this painting, you will not only mix primary pigments to find the secondary and tertiary colors (red and blue make purple, yellow and blue make green, orange with a hint of red is red-orange and so on), but you will need to experiment with adding a dash of compliments to discover the subtle complexities of Monet's palette. When you add a touch of orange to its opposite, blue, you will discover a lovely iteration of blue. For Monet colors, once you have the hue, you will add white to each color to achieve the lovely pales familiar to this artist. When you have your palette, seal it up for Session 2.

Monet 7

Session 2

Start with laying down the dark blue-green in the negative spaces. Then, while the background is drying, begin to add detail to the lily pads and blossoms with the medium values, loading your brush with different hues and unloading them onto the canvas. Rinse your brush in between color changes. When the background dries (and acrylic dries fairly fast), give it a second coat, allowing the subject of the painting to dry a bit. Continue painting in this manner, paining the light values last. You may need to step back from the paintings to discover missing details. Be careful not to mix colors on canvas while paint is wet or the lovely colors will turn to mud.  

Monet2

It's spring. Take a moment to smell the flowers blooming and be inspired by the fragrance. You never know what you might learn. "I perhaps owe having become a painter to flowers," said Claude Monet.

-Kim

Posted on

Knit / Purl through a Great Story

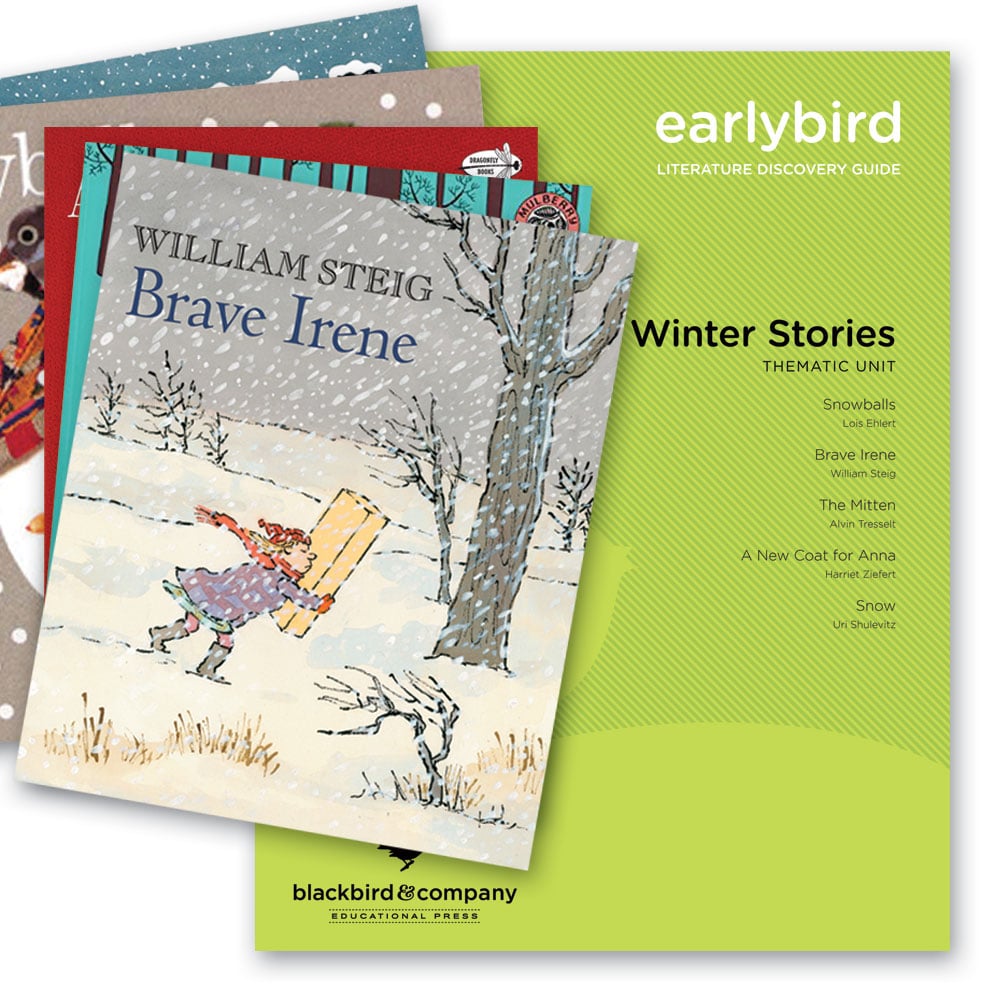
earlybird winter bundle

It all begins with the sheep.

Our Earlybird Winter Discovery Guide’s fourth book, A New coat for Anna by Harriet Ziefert is a sweet story that helps readers learn just where a wool coat actually comes from.

A very fun project is to buy some white wool yarn and dye it with kool-aid packets from the market. Invite fellow students over for a learn-to-knit party!
new coat for anna earlybird winter book

Pick up an Earlybird Winter unit and encourage your students to journal their way through all the wonderful thematic stories.

~Sara
Posted on

Wintry Lexicon, After Jasper Johns

JasperJohns

Where I live there are NEVER snow days (sad face).

But there is ALWAYS white paint!  

For this icy, project I decided to introduce the art of Jasper Johns to inspire my apprentice artists. I'm hoping to inspire yours too. We mad a really large, collaborative piece, but this would translate well into an individual work quite nicely. To begin, have your students gather a dozen or more really wonderful, extravagant words—a lexicon for winter.

You will need to gather the following supplies before you begin:

One large sheet of Cardboard (this one is 2' x 3').

A basket of assorted wood, cardboard, or sticker letters, many sizes and many different fonts.

One good pair of sharp scissors (we also used a heavy-duty paper cutter).

One hot glue gun with a large supply of glue.

A large quantity of white acrylic paint and a large paint brush.


Begin with the background, Create geometry using a random, collage technique, layering shapes on top of each other and glueing them to the background using the hot glue gun. When you are satisfied with the background, begin glueing down the words but it is a good idea to lay them all out before glueing to make sure you are satisfied with the placement. Mix and match type-faces, try placing words sideways and upside down. When the cardboard collaging is complete, the fun begins. Slather on a first layer of white paint. Let the coat dry completely then layer on a second coat, and a third! The trick to a really fun end result is to be courageously spontaneous while layering. When you think your done, keep going!  Keep layering until the work of art feels snowed in. The you will know its winter.


-Kim

Posted on

Art of Words

Colograph

Collagraphy is printmaking process that is related to the art of collage. Do you see the connection between the words? It is sometimes called "relief printing" because the subject to be printed is raised from the print block. You can print anything this way, from fiber to sandpaper, feathers to paperclips. 

Stopping to think about the word origin, one comes from the Greek word koala, meaning "glue" and graph, meaning "write". I thought to myself: "Glue…? Write…? …WORDS!"

So our collagraphs were made by glueing words backwards and in reverse onto chipboard to create our print plates. The more words the merrier. Simple enough. From there, the possibilities are endless. Offer a variety fun colors and let students cloud words onto large scale paper in the style of pop artist Sister Corita Kent. The results will surprise you.


-Kim

Posted on

Head in the Clouds

Cloud

Before the observing begins, explore the science of clouds. The invisible air around us contains droplets of water we can not see until they mingle above to form a cloud. This formation is the result of warm water on Earth evaporating and condensing in cooler pockets of sky above. We've all interpreted the shape of clouds, but scientists have categorized and named them. There are cirrus clouds and cumulus clouds and others too, and there are variations in many combinations: altostratus, cirrocumulus, cumulonimbus. 

Cloud2
Now you are ready to explore. Over the course of many days, observe the sky, making little sketches of what you see. You will discover that no two clouds are alike. Clouds may have similar attributes (puffy, streaked, swirling), but from there, when you look closely and really think about what you are seeing, the similarities disappear.

So how do artists recreate clouds in two-dimensions? They begin just as you've begun, by looking. Using chalk pastels is a fun way to capture the essence of a cloud on paper. Begin by sketching your cloud shape in white, then begin smudging shades of blue in your sky space and tinted white. Sometimes clouds have bits of pink, yellow, blue, even purple, look closely. 

With a handful of chalk pastels, a small stack of 3 x 5 rectangles of bristol board, an aerosol of spray fixative (to spray on completed drawings so they won't smudge), pre-cut mat board, and your head in the clouds, you too can create a wonderful little museum of clouds.

Cloud7

Cloud6

Cloud 3

Cloud5

Cloud4

Posted on

Leonardo’s Big Idea


When Leonardo Da Vinci died he left the world more than 6,000 pages of ideas.

Think revolving bridge, winged glider, or self-propelled car, and you will begin thinking like Leonardo.

Now, think colossal horse, and you will most certainly be moving in the direction of the Renaissance man. Most of us have heard of Da Vinci’s Mona Lisa, but, Il Cavallo? Not so much. Read more here.

So this past week, we gathered to learn more of this marvelous dreamer, and to be inspired by his prolific idea making. And after reading Leonardo’s Horse by Jean Fritz (and ogling over the illustrations by Hudson Talbott), we got to work.

As I tried to imagine the complex engineering of the inner scaffolding, what Leonardo had to consider to create the clay model, let alone the bronze cast, I decided to focus our art making on the bones of sculpting. So from pipe cleaners, pom pons, yarn, and a lump of air drying clay we fashioned our horse.

Version 1.0.0

And what a horse. It’s not Leonardo. No. But it is certainly an inspired idea. And I imagine, this would make Leonardo smile. For he knew, better than most: “Art is never finished, only abandoned.”

~Kimberly