Posted on

It’s Section 5 Season!

It thrills us this time of year to know that many students have completed (or are close to completing) the first of their six CORE Blackbird & Company ELA units and are brainstorming ideas for the Section 5 culminating project.

To celebrate this season, click through here to download a FREEbie Section 5 Planning Worksheet.

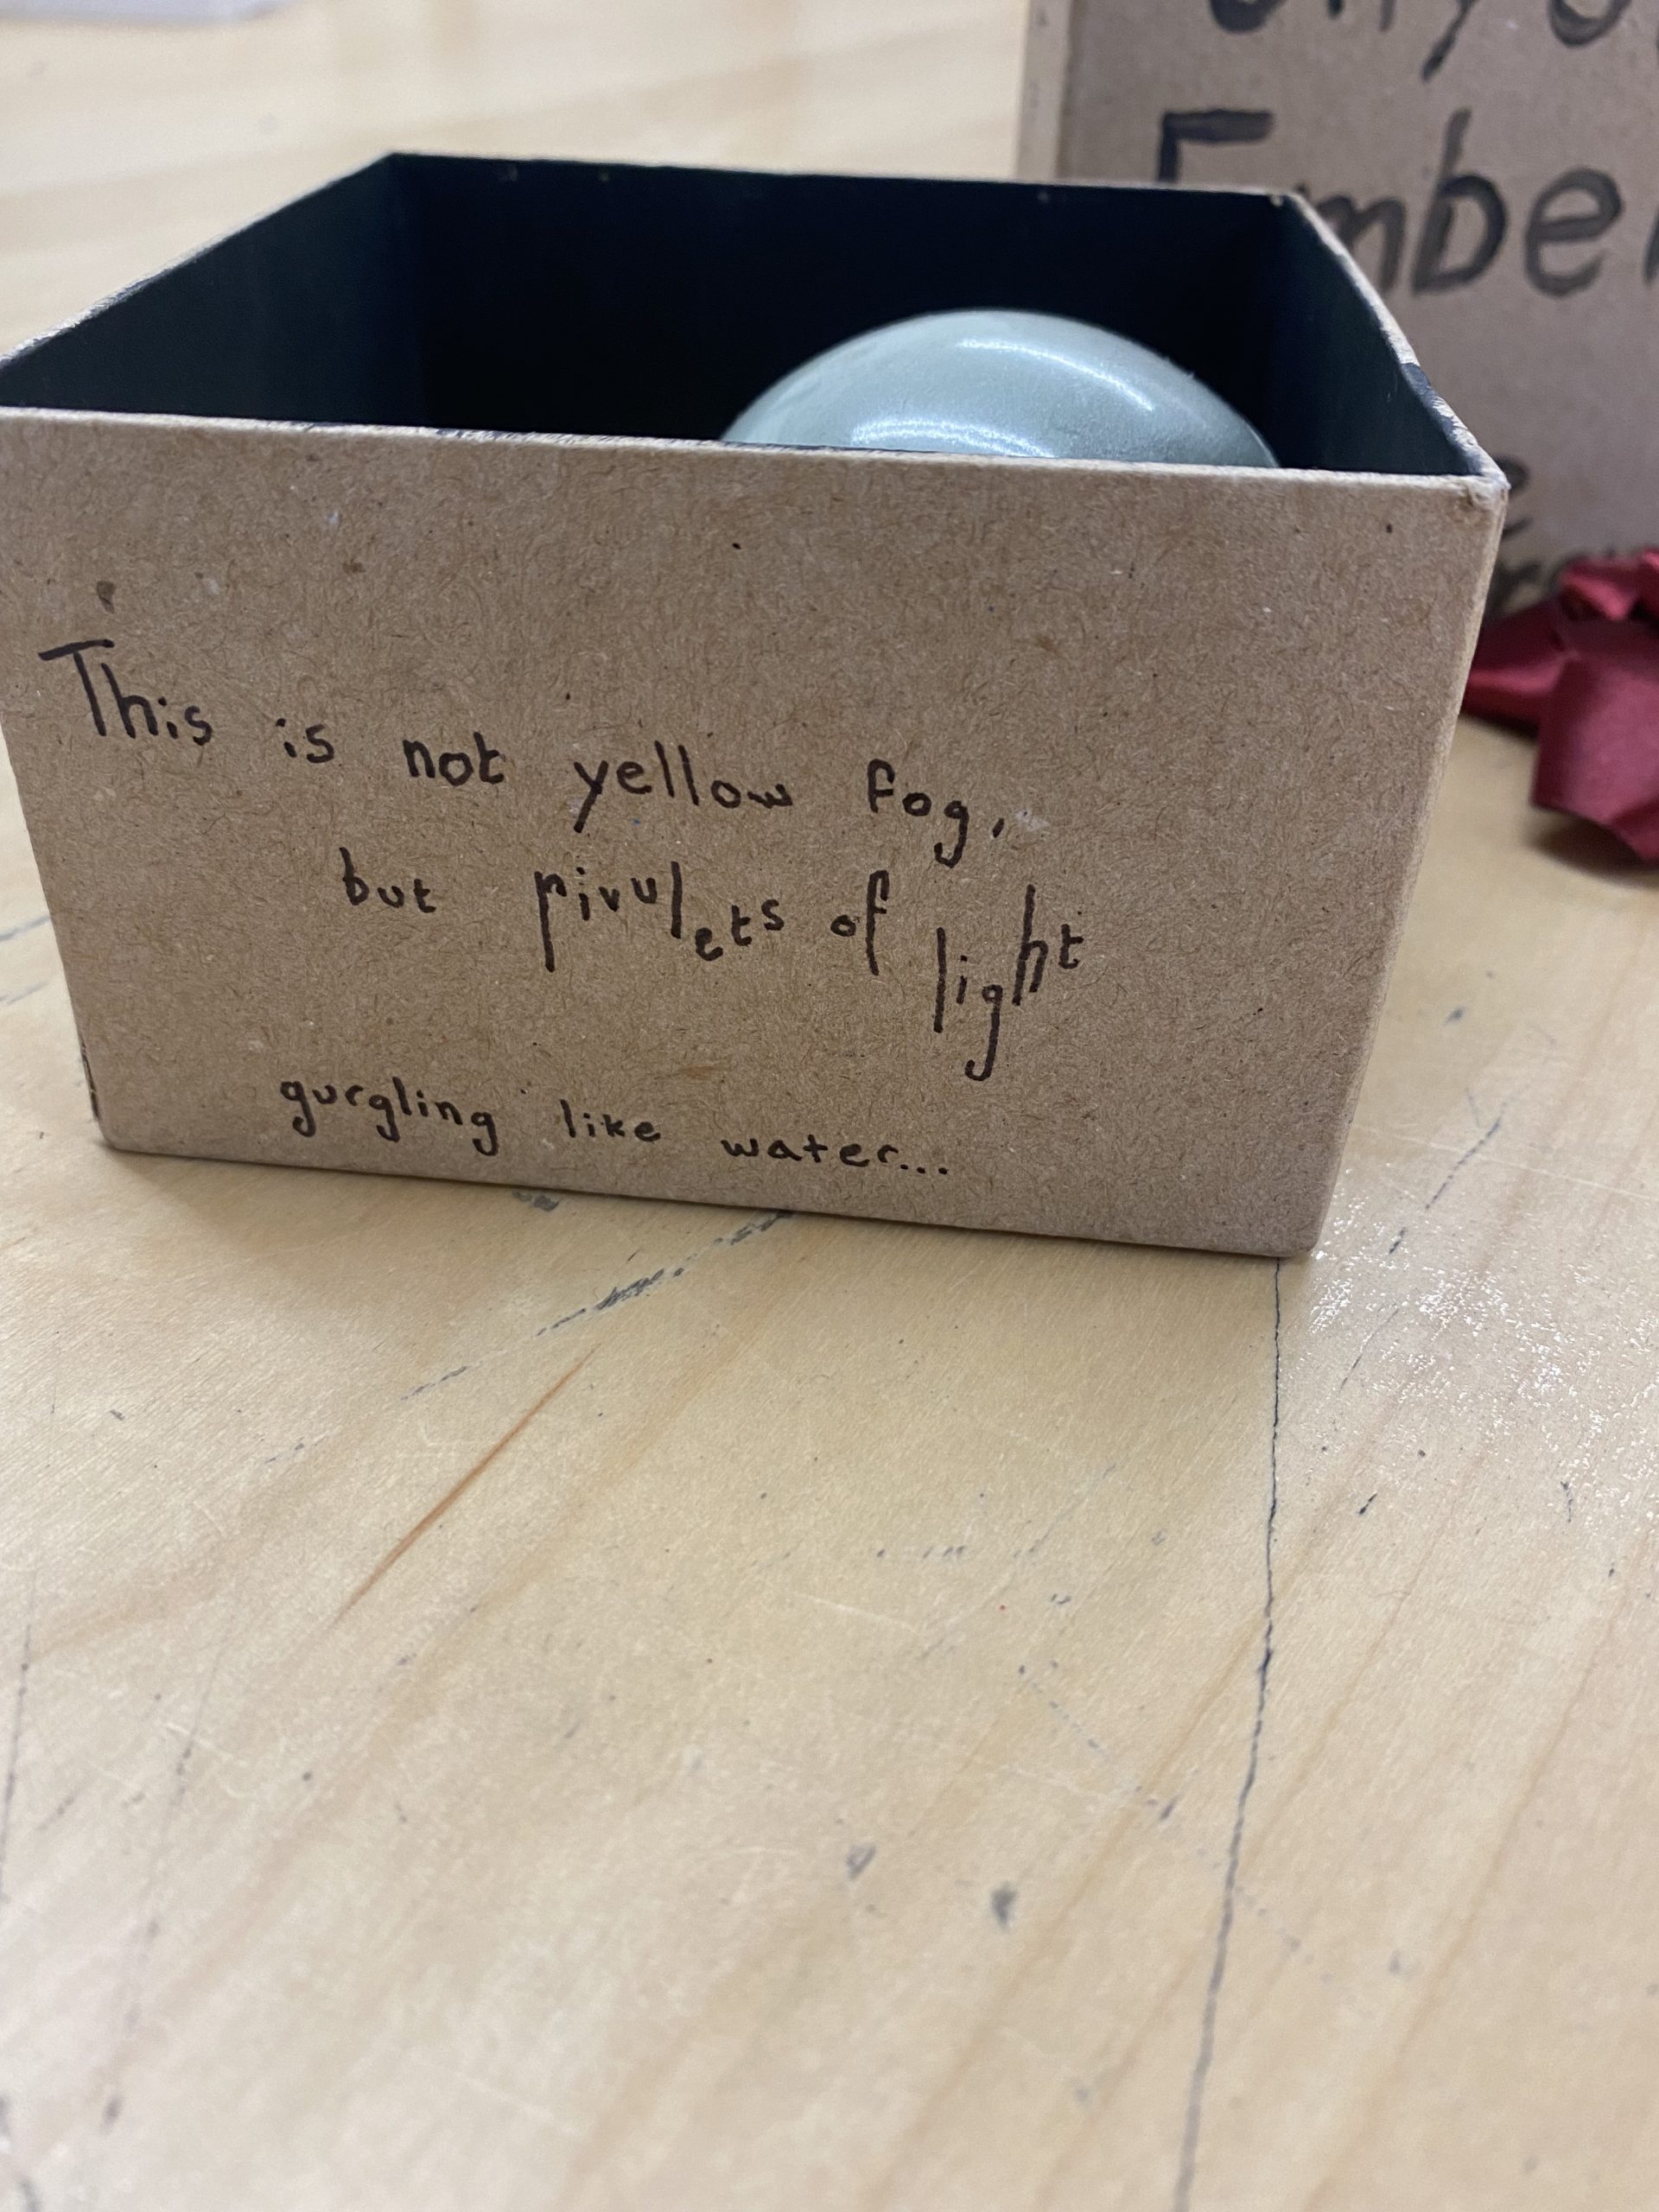
Section 5 is the week when students get to step outside of the rhythm of reading, contemplating, and journaling and create a project to celebrate the story’s wonder! This project is a throwback to a Blackbird and Company limited edition “Section 5 Kit” tied to City of Ember by Jeanne DuPrau. We provided the box, a lightbulb shaped jar, black paint, glow-in-the-dark paint, paintbrush, Sharpie, and left the rest to the student’s imagination.

Earth is, of course, being ravaged by a series of apocalyptic events known as the Disaster. Light is one of Ember’s most important resources. Without light, the city will cower in complete darkness. Around the clock darkness. Not good. It is this terror of darkness that drives the story. So when the great lamps that light the city begin to flicker, Lina and Doon have a quest set before them. With blackouts and shortages someone needs to take action! Why not our twelve-year-old protagonists?

But we stop here because the purpose of creating a culminating project is NOT to retell the story, but rather to advertise. That’s right, advertise. The culminating project should share JOYbites from the book that will inspire others to pick the book up and fearlessly enter the world of the story.

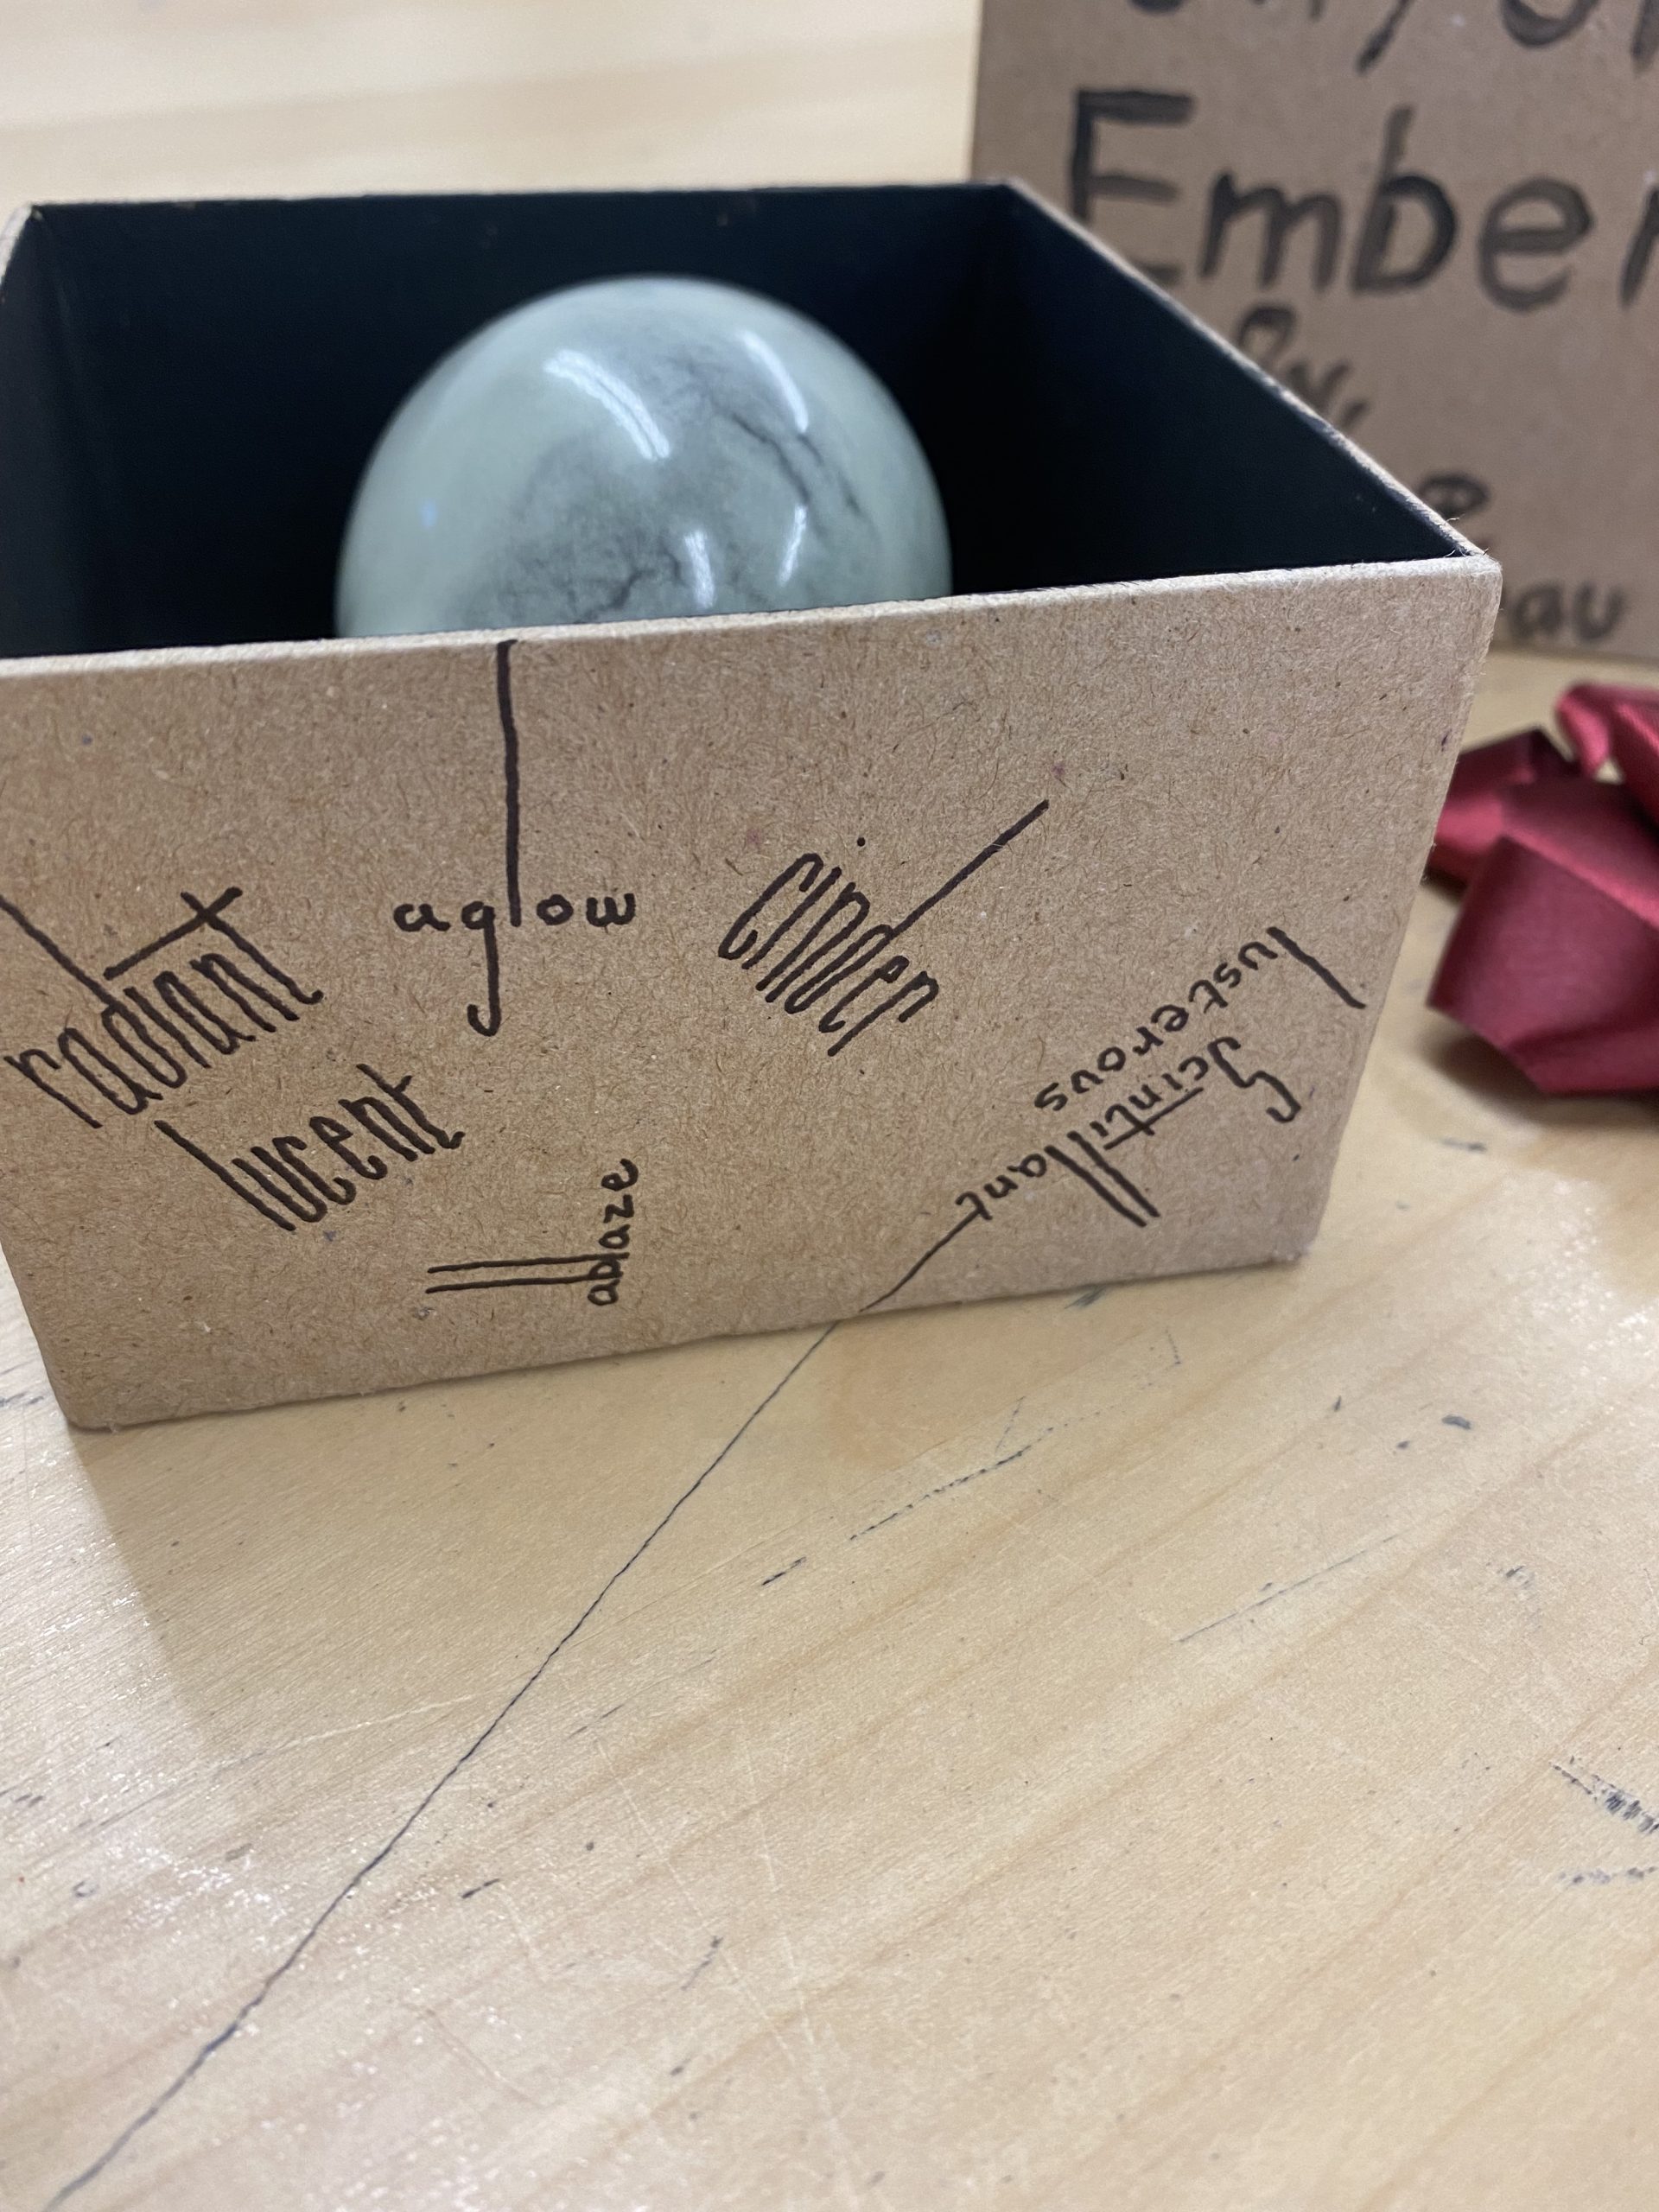
For this Section 5 project, the student decorated the outside of the box with juicy words and quotes from the story, painted the inside of the box black represent the problem facing the people of Ember, and poured the glow-in-the-dark paint into the light bulb. Ultimately the little project is an amazing advert!

Now its your turn.

Download the FREE Section 5 Planning Worksheet and get started on your build week.

It’s Section 5 Season!

So never, never  e v e r  skip Section 5!

Section 5 is a gift…

~Kimberly

Posted on 1 Comment

Let’s Talk Section 5

Each and every Literature + Writing Discovery Journal (the core of our language arts offering) sets aside a week to create and celebrate.

Don’t wait until week 5 to begin thinking about your Section 5 idea!

Why not start imagining during Section 2?

Make a plan.

During Section 2, begin brainstorming. Download our free planning worksheet to begin brainstorming. Write down your ideas and, since your Section 5 will include a visual component, create small sketches demonstrating different ways you imagine your idea might take shape and what materials you might utilize.

During Section 3, choose the idea you like best and make a full-page sketch with labels that will help you prepare.

During Section 4, gather all the materials you will need to complete your project build.

After all this, when week 5 rolls around, you will be prepared to focus on creating a meaningful project. A project that you will surely be proud of for years to come. Check out our Student Project Gallery to be inspired. Send us photos of your completed project so we can add it to the gallery to inspire others.

Posted on

Forget the Flashcards: Bake a Cake

IMG_7725

One of the best ways to learn to think is to learn about the tools available! empowering your students to learn about the parts and functions of their brain will inspire them to tap into the vast potential of this amazing frontier. We are not left-brained or right-brained; we are “whole-brained.” Get to know how this happens by doing some research and and you will be awestruck.

Your brain weighs about 3.3 lbs and is 73% water.

Your brain contains roughly 86 billion brain cells.

All the messages sent by all phones in the world taken together number less than those sent by your brain.

Your brain information travels up to 268 miles per hour.

Your brain works faster than the fastest computer in the world.

 So don't delay… learn about the parts and functions of your brain so you can tap into your potential!

And after you do, bake a cake to celebrate what you learned. You will be surprised what you learn in the process!


-Kim


Posted on

Making Carolus Linnaeus Proud

“If you do not know the names of things, the knowledge of them is lost too.”
                                                                            -Carolus Linnaeus
This fall we introduced our brand new 8-week unit, Taxonomy of Living Things: The Five Kingdoms, our brand new Research Discovery Guide. Learning about the way scientists organize living things teaches us about, not only nomenclature, but also about anatomy.  Making models alongside research is a super way to commit this information deeper into understanding.
This project began with a challenge to create imaginary insects. The goal was to solidify understanding of the first three hierarchies of taxonomy: Kingdom, Phylum, Class.
To begin, you might explore the following questions:
Q. What is an animal?
A. Animals are multicellular, eukaryotic organisms that can can move spontaneously and independently.
Q. What is an invertebrate?
A.  Invertebrates are animals without a vertebral column.
Q. What is an arthropod?
A. An arthropod is an invertebrate animal having an exoskeleton, a segmented body, and jointed appendages.
Q.  What is an insect?
A. Insects are a class of invertebrates within the arthropod phylum that have a chitinous exoskeleton, a three-part body, three pairs of jointed legs, compound eyes and one pair of antennae.
Now, using Fimo clay, wire, pipe cleaners, tiny pompoms, T-pins, and whatever other materials you can imagine, create an imaginary insect following the guidelines of biological taxonomy. Be sure to show the stages of metamorphosis. When your model is complete, pin it and create a label identifying the insect through all the taxons (kingdom, phylum, class, order, family, genus, species). The first three are given, use your imagination create names for order, family genus and species.
Research is an extraordinarily important skill across all subject areas. Coupling research with hands-on projects will build knowledge through creativity, and this is the kind of knowledge that lasts.
-Kimberly
Posted on

Considering Milkweed

Milkweed


Common milkweed, when broken, drips a milky sap. Likely this is how it earned its name. The caterpillars of the Monarch butterfly feasts on this particular plant. The nectar of Milkweed is precious. Anyone who has studied this butterfly knows that is is resilient.

Jerry Spinelli's Milkweed opens from the point of view of an orphaned boy on the streets of Warsaw at the dawn of World War II. The metaphorical connection between the title of the book and the resilient young protagonist is not lost on the reader: "Call me thief. Call me stupid. Call me Gypsy. Call me Jew. Call me one-eared Jack. I don't care. Empty-handed victims once told me who I was. Then Uri told me. Then an armband." Read on to discover how resiliency transforms this Monarch of a boy. In the process, you might plant some Milkweed and consider its connection to the story for your Section 5 project.


-Kim 

Posted on

after Robert McCloskey

McCloskey

During the fifth week of Discovery, Section 5 encourages each reader to develop a creative culminating project with options that provide a variety of ways to demonstrate deep understanding of the book. Your students will not only have a chance to demonstrate their originality, organization, clarity of purpose, and critical thinking skills, more importantly this culminating endeavor will allow them to show off what they have learned in their own, uniquely creative way.

Students really love sharing their culminating thoughts about great stories. Encouraging readers to create Section 5 projects with a high level of execution teaches them that their ideas are valuable and builds integrity into their work.

This sweet and yummy final project was sparked by our Robert McCloskey Earlybird literature discovery guide. After reading Blueberries for Sal, this student was inspired to do a little research on blueberries and bake muffins for his friends! Learning over great books is so rich!

Take a look at our Flickr page for some great examples of culminating activities. We’d love for you to share your ideas.

-Tracey

Posted on

Unplug: Wire Works

Wirering

Most of my boy’s friends are not only scheduled to the hilt with summer activities, the majority of their down time is spent video gaming or surfing the web.

My boys are embarking upon August charging ahead recklessly into the Unplug Challenge.

And guess what?

My boys are enjoying the plummet into low tech!

Today, unplugged is all about wire and divergent thinking.

Here’s what Sir Ken Robinson has to say, “Divergent thinking isn’t the same thing as creativity. I define creativity as the process of having original ideas that have value. Divergent thinking isn’t a synonym but is an essential capacity for creativity. It’s the ability to see lots of possible answers to questions, lots of possible ways to interpret a question, to think laterally, to think not just in linear or convergent ways, to see multiple answers, not one.”

So what can you make with a couple spools of wire?

– Kim

Posted on

Sewing Fall Pumpkins!

DSC_0022
DSC_0020

Fall always provides inspiration in abundance. Pumpkins are everywhere! But we all know that once fall arrives, it's too late to actually plant. So if you've missed your window for sowing pumpkins seeds in your garden, use this summer to make some cute and easy quilt squares. These can be finished off and used for wall hangings, pillows, buntings, or festive table top decorations.

Materials:
– various fabrics scraps for pumpkins & stems
– background fabric
– fun coordinating fabrics to surround the base square (I used bright blue which is the complement of orange)
fusible webbing such as Wonder Under or other brands
– sewing machine, needle/thread
– fabric scissors, rotary cutter, cutting mat
 
Directions:
– fuse one side of the pumpkin and stem fabrics that you have chosen
– draw pumpkins and stems onto the fused backing with a pencil, cut out
– cut your square for the background and border pieces
– following the directions on the fusible web, iron on the pumpkin and stems to the background square
– hand stitch around the shapes or machine stitch about an 1/8th “ from the edges
– apply contrasting fabric strips along edges of square (we used a skewed log cabin technique)
– square up your finished square with an Olfa cutter and mat
– finish edge according to what your final project will be

– Sara